Visma.net ERP
About table rows and columns
In tables in Visma.net ERP windows, tabs, or dialog boxes, each row represents an object or detail (such as an account, a stock item, a document row, or a journal entry) and each column shows a parameter of the object or detail in the particular row.
Right-clicking within the rows of a table opens a shortcut menu.
The commands you see in the
menu, which depend on the table you are working with, are mostly duplicates of actions on the
table toolbar, but they offer you easier access to them.
The unique menu commands are described
in the following table.
| Option | Description | |
|---|---|---|
| Clear column filter | Clears the simple filter that you have applied to the selected column. | |
| Filter by this cell value | Filters the data in the table by the value of the selected cell, causing only rows
with this value in this column to be displayed. For details, see: Filter the data in a table. |
|
| Refresh |
|
Refreshes the data in the table. |
| Adjust |
|
Adjusts the table to the screen width and makes the column width proportional. |
| Export to Excel |

|
Exports the data in the table to an Excel file. |
You can use  - the Column configuration dialog box - to work with tables in
ways that better suit your needs.
- the Column configuration dialog box - to work with tables in
ways that better suit your needs.
By using this dialog box, you can do the following:
- Change the visibility of the columns in the table
- Adjust the order of columns
- Restore the default table layout
- Save your changes to the table layout, including the quick filters and sorting you have applied to the table
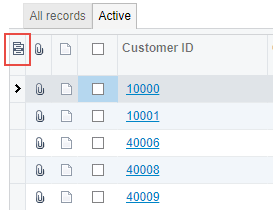
To open the Column configuration dialog box, you click - the Column
configuration - button the leftmost icon among the column headers , shown in the screenshot below:
| Element | Description |
|---|---|
| Search for available columns | A field in which you can start typing, and the system displays the list of columns whose names contain the string you have typed in the Available columns list. |
| Available columns | The columns that are hidden from the table. |
| Selected columns | The columns that are shown in the table. |
| Search for selected columns | A field in which you can start typing, and the system displays the list of columns whose names contain the string you have typed in the Selected columns list. |
| Add column (button) | Moves the selected column to the Selected columns list, causing it to be displayed on the table. |
| Remove column (button) | Moves the selected column to the Available columns list, causing it to be hidden from the table. |
| Move up (button) | Moves the selected column up in the list (that is, to the left side of the table). |
| Move down (button) | Moves the selected column down in the list (that is, to the right side of the table). |
| Reset to default | Loads the default table settings. |
| Delete default configuration |
Deletes the default configuration of the table columns created in the Share
column configuration dialog box. |
| OK | Applies your changes and closes the dialog box. |
| Cancel | Discards all unsaved changes and closes the dialog box. |
Parent topic:
Tables - overview
Related concepts
About the adjusting table layout
Related tasks
Hide or display table columns
Adjust column widths
Change the order of columns