Visma.net ERP
About the table toolbar
Each table in an Visma.net ERP window, tab, or dialog box has a table toolbar, which contains the buttons you can use to
work with the details or objects of the table.
A toolbar, shown in the screenshot below, includes buttons that are specific to the table, standard buttons that most table toolbars have, and the search field (for some tables; for others, the search field is displayed in the filtering area).
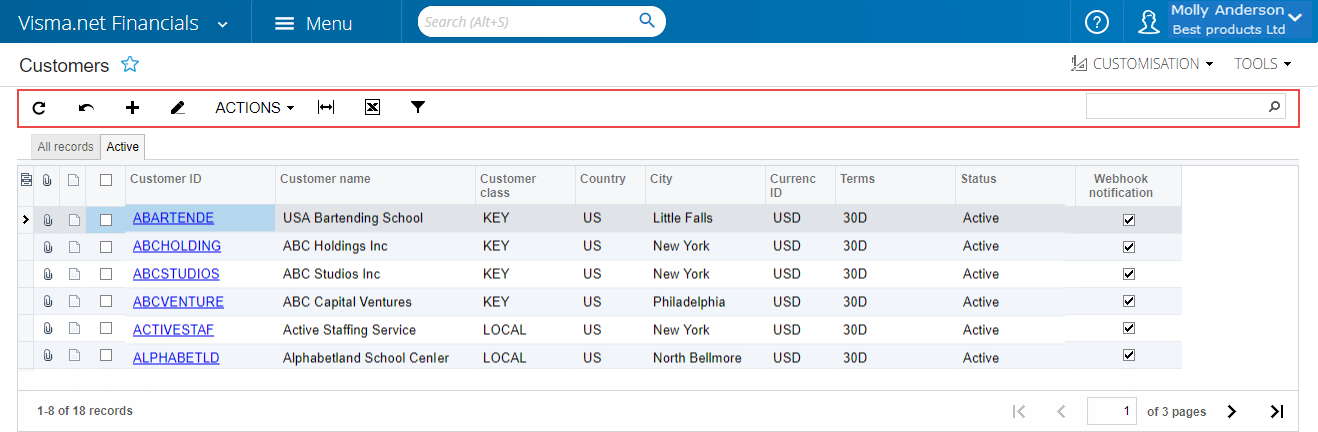
The following table describes the standard table toolbar buttons.
A table toolbar may
include some or all of those buttons.
If a table toolbar includes table-specific buttons,
they are described in the window reference help topic.
| Button | Icon | Description |
|---|---|---|
| Refresh | Refreshes the data in the table. | |
| Switch between grid and window | Controls how the elements are displayed in the window: in a table (grid) with rows and columns; or as separately arranged elements for one table row in a window, with navigation tools you use to move between row data. | |
New record | Direct you, for example, to the Purchase order or the Customers window to create a new purchase order or customer. | |
| Delete row | Deletes the selected row. | |
| Fit to screen | Adjusts the table to the screen width and makes the column width proportional. | |
| Export to Excel |  | Exports the data in the table to an Excel file. |
| Filter settings | Opens the Filter settings dialog box, which you can use to define a new advanced filter. After you create and save the filter, the corresponding tab appears on the table. | |
| Load records from file | Opens the Filter settings dialog box, described in detail
below, so you can locate and upload a local file for import. You can use this option to import data from an Excel spreadsheet (.xlsx) or .csv file. For the detailed procedure, see: Import data from a local file to a table. | |
| Search | A field in which you can type a word, part of a word, or multiple words. As you type, the system filters the contents of the table to display only rows that contain the string you have typed in any column. |
With the File upload dialog box, you select a file of one of the supported formats (.csv or .xlsx) to import data from the file.
| Element | Description |
|---|---|
| File path | The path to the file you want to upload. To select the file, click Browse, and then find and select the file you want to upload. |
| Upload (button) | Closes the dialog box and opens the Common settings dialog box, where you specify the import settings. |
In the Common settings dialog box, which opens if you click Upload in the File upload dialog box, you specify the import settings for a file that you has selected in the File upload dialog box.
| Element | Description |
|---|---|
| Separator chars | The character that is used as the separator in the imported file. By default, the comma is used as the separator. This field appears only if you import data from a .csv file. |
| Null value | Optional. The value that is used to mark an empty column in the imported file.
|
| Encoding | The encoding that is used in the imported file. This field appears only if you import data from a .csv file. |
| Culture | The regional format that has been used to display the time, currency, and other measurements in the imported file. |
| Mode | The mode defining which rows of the uploaded file will be imported into the
table. The following options are available:
|
| OK (button) | Closes the dialog box and opens the Columns dialog box. |
| Cancel (button) | Closes the dialog box without importing the data from the file. |
In the Columns dialog box, which opens if you click OK in the Common settings dialog box, you match the columns in the imported file that you have selected in the File upload dialog box to the columns in the Visma.net ERP table to which you are importing data.
| Element | Description |
|---|---|
| Column name | The name of the column in the uploaded file. |
| Property name | The name of the corresponding column in the table in Visma.net ERP. |
| OK (button) | Closes the dialog box and imports the selected file. |
| Cancel (button) | Closes the dialog box without importing the data from the file. |
Parent topic:
Tables - overview
Related concepts
About the integration with Excel