Visma Skatt & Bokslut Pro
Start guide
The Start guide is where you set up the basic properties of your company. You can navigate between the different steps by clicking Continue and Back. When all options are set, click Save and you are good to go!
Most of the options in the start guide are possible to change afterwards.
- Select Customer type.
Read more about what company types and regulations are supported in the topic What company types and regulations are supported in Visma Skatt & Bokslut Pro?..
- Select additional preferences for the selected company type.
For a Limited company, a Regulation for year-end closing must be selected.
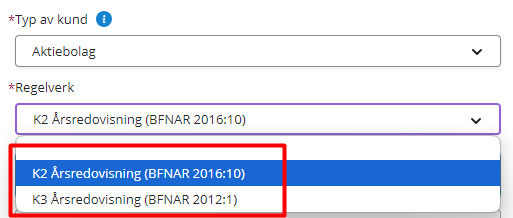
If you are not sure what regulation to select, see the page K1, K2 and K3 - choose the correct regulation for your company.
Once the company has been set up, it's possible to change regulation from K2 to K3. If you need to change it the other way around, the company needs to be recreated.
For a Private individual, select a year from First year to work with.
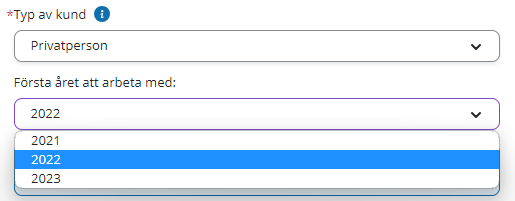
The selected year will be the calendar year you work with in Visma Skatt & Bokslut Pro. It will be presented as a single line on the start page. No periods will be available.
- In the Customer data section, the customer information from Visma Advisor is displayed. If you want to override this information, enable the Override customer data from Visma Advisor toggle.
Customer data be changed later under Maintenance - Customer information.
- Click Continue.
- On the next page, select Data source. This is the source from which all accounting data is added.
- Click Continue.
Preferably, use Visma eEkonomi as data source. You will then be able to keep the accounting data updated on a running basis, benefit from the built-in integrations and the possibility to create and transfer closing entries.
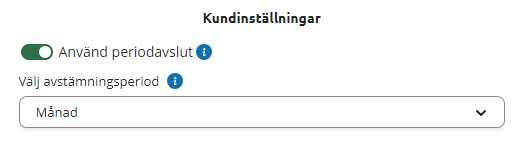
- On the next page, select Reconciliation period. It determines how often you want to reconcile.
You can choose to use period closing or not by using the Use period closing toggle. With period closing enabled, you can manage your reconciliation for each month or quarter. When disabled, you do the reconciliation for an entire year. This can be changed later under Maintenance - Customer information.
This feature is not available if you are using the service via Visma Advisor.
We recommend you to reconcile often to keep control and to avoid heavy workloads.
- Click Continue.
- On the last page, make sure that everything is set up correctly, then click Save.
The Start page will open.
To get started, you will need to add the accounting data. Read more about it in the topic Set up data source.


