Visma Skatt & Bokslut Pro
Notes
In Year-end closing - - Notes, you find a selection of notes that can be included in the annual report. The system generates notes that are mandatory for
What note information to be given in the annual report must be considered for each company individually.
Add and delete notes
You can add notes that are not generated automatically by the system, by clicking on the button Add on the lower left in the menu.
You delete a note by selecting the note and click on the button Delete in the lower right.
It's possible to set your own headings on some of the rows. Hover with the mouse cursor on the title and click on the appearing pen icon. Rows without the pen-icon should not be altered according to Bolagsverket.
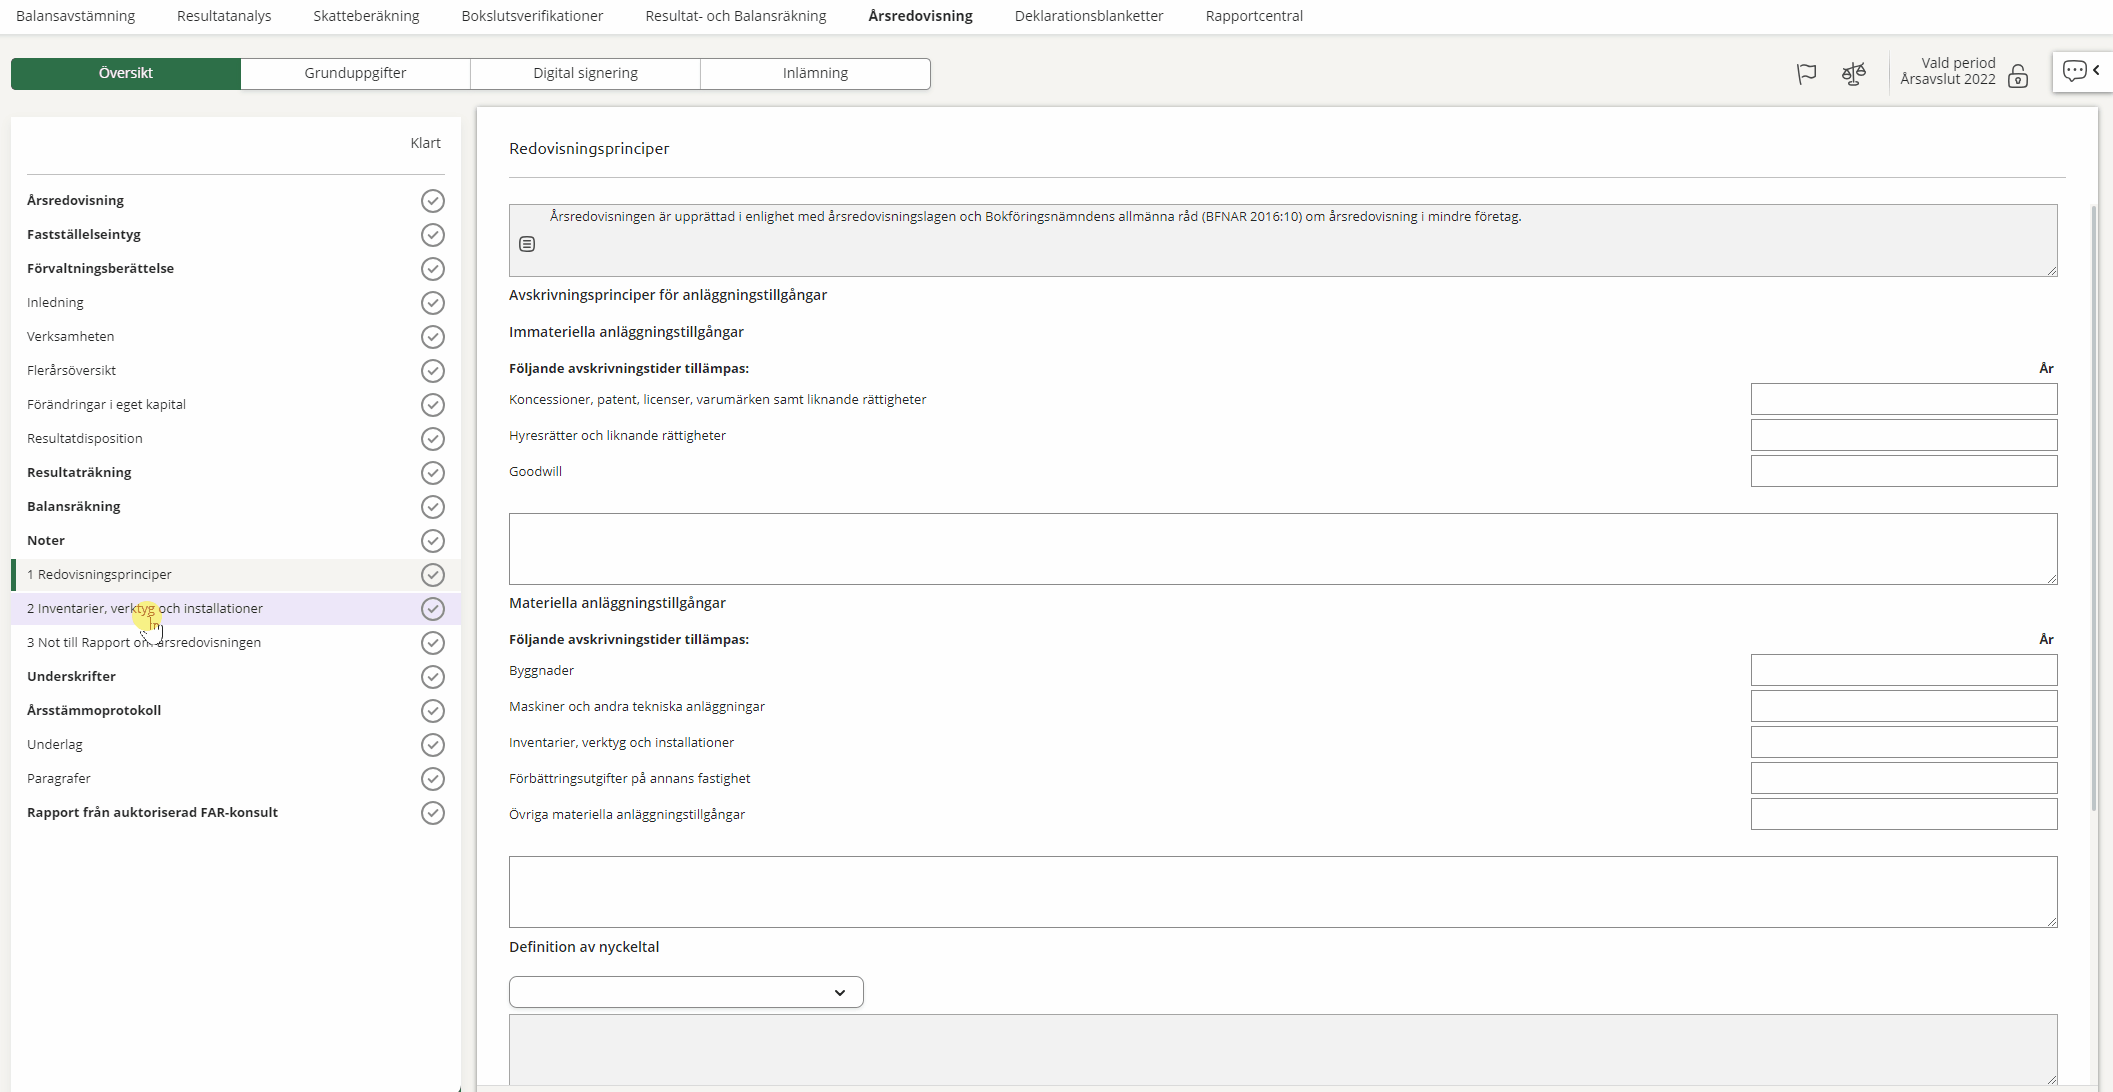
Connect notes to rows in the income statement/balance sheet
Under Note reference in income statement/balance sheet, you can see which row in the income statement or balance sheet the note is referring to. You are able to edit this suggestion. Start typing in the field to search for the line you wish to select. Click the plus- or the minus sign to add or delete rows.
Change status of notes
Approve a note by clicking on the status symbol in the column Done. If the data is changed after it has been approved, the status symbol will change color from green to orange, which means you should review and approve the document once again.
Return to the annual report by selecting Preview annual report in the lower right.
Change the order of notes
You can change the order of the notes by dragging and dropping them where you want them. Do like this:
- Activate the option Re-order the notes.
- Drag and drop the notes in the order you want them.
The notes will be displayed in the order you have chosen. The change appears in printouts and when the annual report is submitted to Bolagsverket.
When you deactivate the function to move notes, your changes will be restored and the notes will be displayed in their original order.
Own notes
For limited companies using K2 or K3, you can create your own notes where you can add optional headings and texts. You can also include a table with one or more rows showing values for the current and previous years. Of course, you can also link the note to the relevant accounts in the income statement or balance sheet. When you submit the annual report digitally to Bolagsverket, the note will be sent as untagged data. You can currently add up to three own notes.
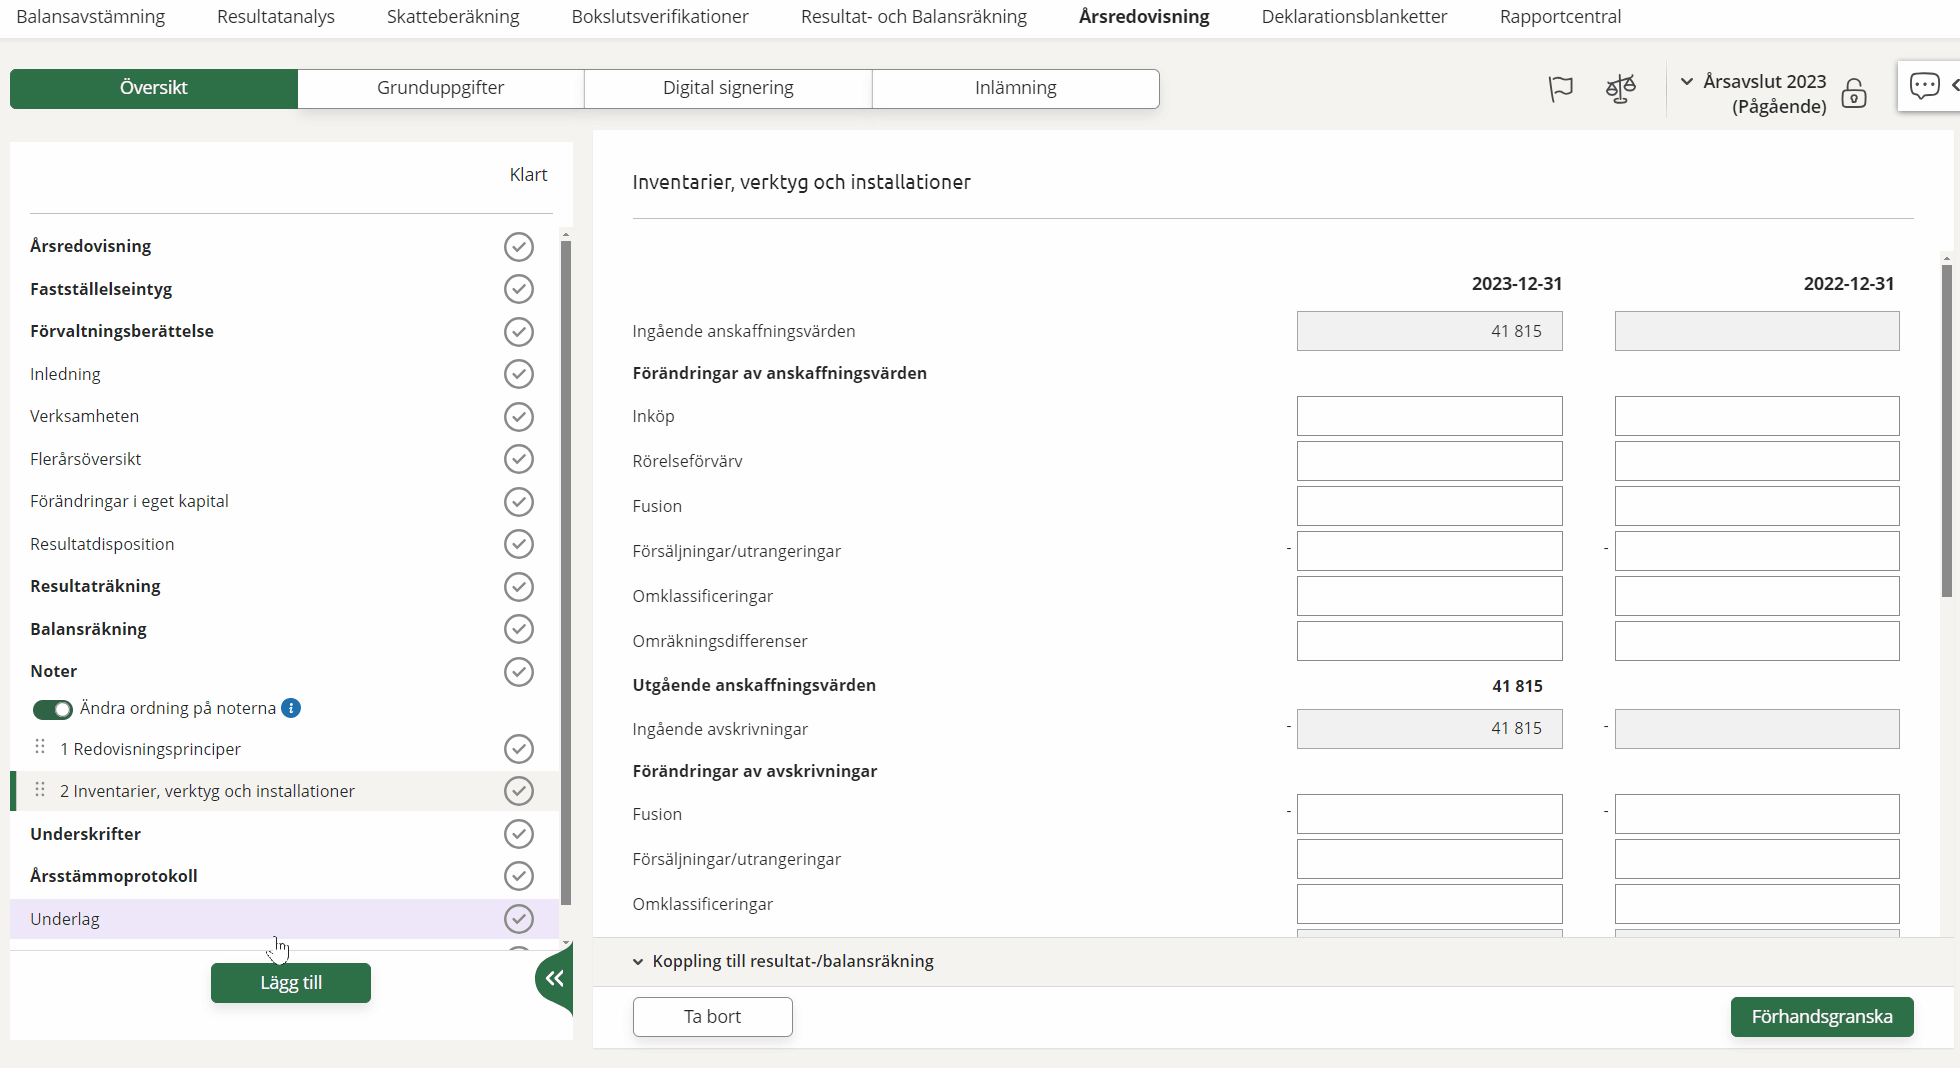
Fixed assets notes
When the appendix Fixed assets - summary has been created with values for purchases, sales, disposals, depreciations, impairments and appreciations, these values will be transferred to the notes for intangible and tangible assets. A link to the appendix is available when clicking in the field
If you have made appreciations, keep in mind that depreciations on the appreciated amount must be calculated manually and then entered in the field Depreciations for appreciated amount for the year for each note. You also need to adjust the field Depreciation for the year. The same applies when you have made impairment loss on an appreciated amount (K3 only).
If there is no appendix for fixed assets, the values are collected from account balances.
How fields work in Visma Skatt & Bokslut Pro
White fields are for manual input of values. Grey fields contain values generated by the system or taken from elsewhere in the programme.
Values in grey fields can usually be changed by clicking on the menu icon that appears when you hover over the field and select Override amount. When an amount has been changed, the field is highlighted in yellow. To restore the value, hold the pointer over the field again, click on the menu icon and select Reset. Click on the image below to view:

| Input fields. Here you enter the values yourself: |
|
|
Calculated fields or fields where values are taken from elsewhere in the program: |

|
| A field where the amount has been changed manually: |

|
View linked accounts
Some grey fields contain values linked to other accounts at the reference account level. These links are managed under Maintenance - Chart of Accounts.
To view the linked accounts, hover over the field and select Show accounts from the menu that appears. If there are mapped accounts without balances, you can include those as well by marking the checkbox Include mapped accounts without balances in the dialogue box that opens. Click on the image below to see what it looks like:

Read more about reference accounts, chart of accounts and how to change accounts in the topic Chart of accounts.
Related topics
Warnings and errors when checking the annual report
How do I inform in the annual report that the company was affected by the war in Ukraine?
How do I inform in the annual report that the company was affected by the corona spread?
Guidance to year-end closing for smaller companies (K2) (BFNAR 2016:10)
Guidance to K3 - Annual report and consolidated accounts (BFNAR 2012:1)


Search words: notes, add notes, delete notes, connect notes